
Official manual · chapter 1
Connecting Cables to VRROOM
Original text and images from the official 8K VRROOM User Manual (Rev 1.00), pages 7 and 13–14. Click or tap any image to enlarge it.
Connecting Cables to VRROOM

- HDMI 1.x video device must be connected to 1080p Downscale TX1 Output port.
- Make sure that you are using 1200MHz certified or tested HDMI 8K cable in copper or fiber tech if you plan to set up a 1200MHz/40Gbps link in your setup.
- Connect Power connector from Power supply (110-240V 1.2A IN & 12V 1A OUT).
- Connect a source via HDMI input cable to ANY HDMI input. Default input is HDMI/INP0.
- Connect any other HDMI, Ethernet, sound, IR or RS232 cable that you might need (optional)
- HDMI cable must support 40Gbps if any 40Gbps source/sink is connected (except for Audio Outputs)
Help on Jack connections
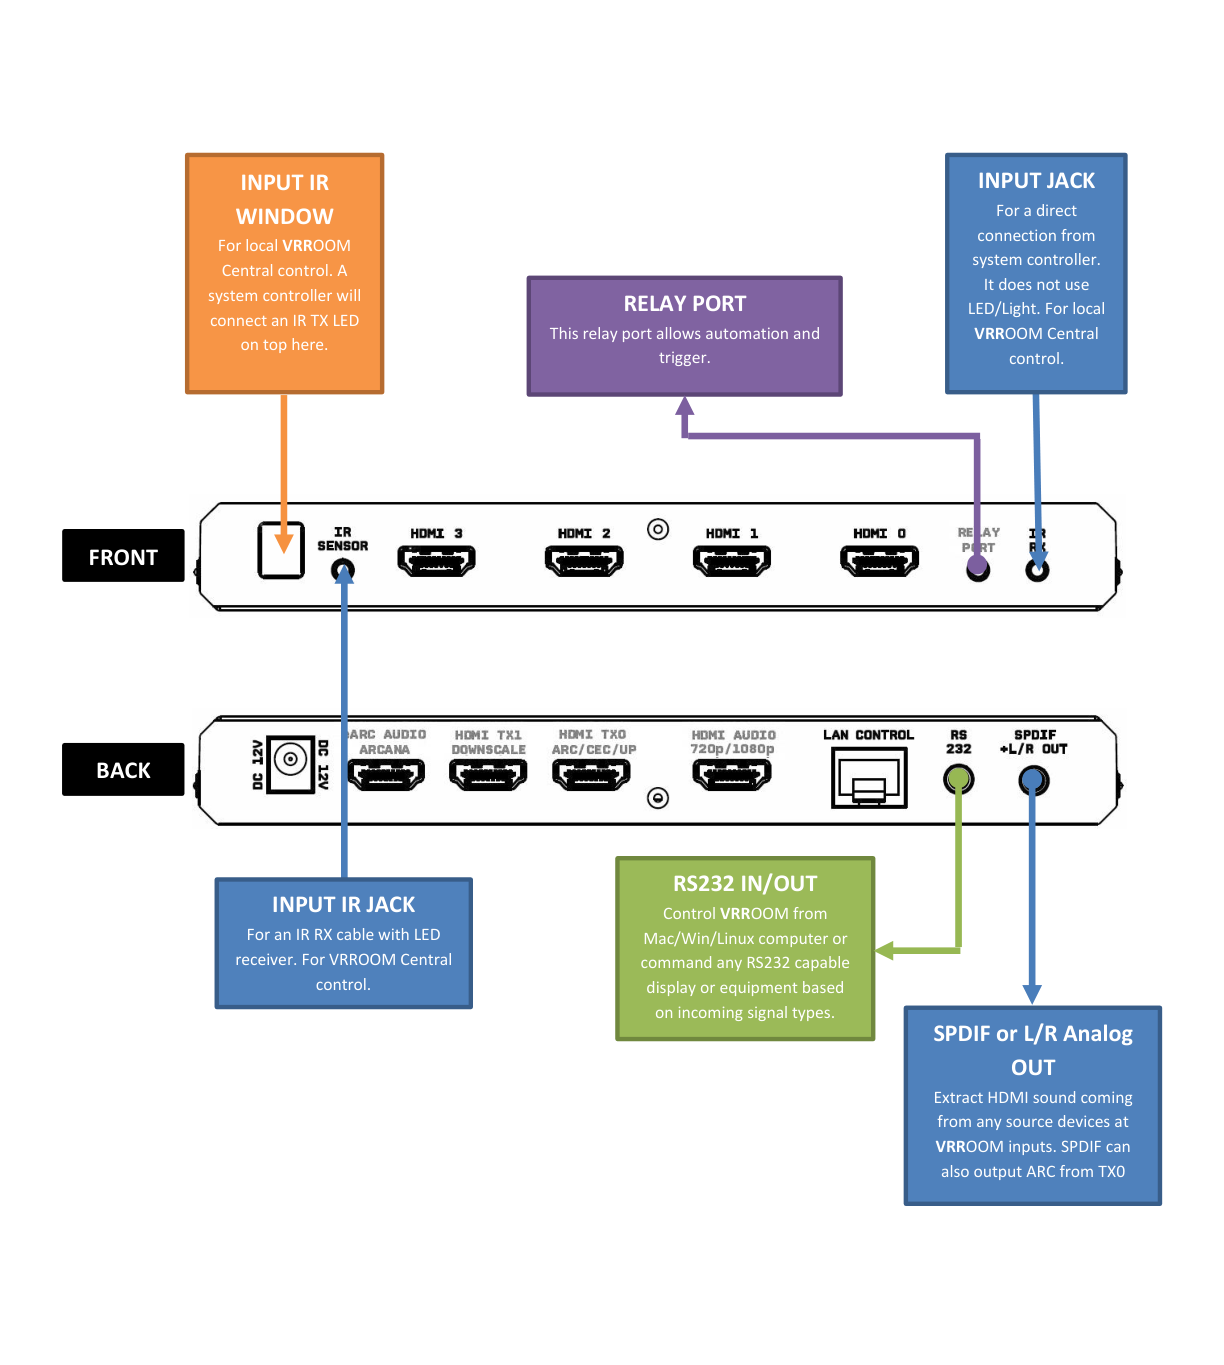
Help on AUDIO/CEC/ARC/eARC connections
